Training video created by the teacher on own computer
Panopto course video folder, its creation and use
Videos, that are meant to share in Moodle course, are recommended to be saved into Panopto service and connect Panopto folder to the course. Moodle course connected Panopto folder’s viewing and editing rights are given automatically based on Moodle course role: all teachers are granted equal editing rights and only students in the course are granted viewing rights to the videos.
The course video folder is ideal for storing lecture recordings, because it will automatically display new videos to students without the teacher having to edit the access rights to the video and link it to the Moodle course area.
As a teacher, you can upload finished videos into the course folder or you can create videos using the Panopto software and a mobile app, much like you would into your own folder. You must specify the course folder as the destination folder instead of My Folder. You can create subfolders and give students video assignments by adding a video assignment folder into your course folder (see separate instructions).
The creation of a course video folder
You can add a Panopto course video folder to your own Moodle course as follows (you will also be assigned the creator role in the Panopto service):
- Turn the edit mode on in the Moodle course area.
- Click on the Add block link in the top of the right column.
- Select Panopto.
- Click on the Provision Course link on the Panopto block that has appeared in the right column.
This creates a course video folder and access rights groups in Panopto.
The video links in the Panopto block only work with TUNI user account. If you have students in your course without TUNI user account (students with HAKA login from other universities or students using separate Moodle account), you must add the Panopto LTI course folder activity to your Moodle course in addition to the Panopto block:
- Turn the edit mode on in the Moodle course.
- Click on the Add activity or material link in the section of your choice.
- Select Panopto LTI course folder.
- Only complete the Activity name field (link text) in the form and save.
- Check by clicking the link that you are able to access the course video folder via the link.
The course video folder is created in the academic year specific parent folder. If you wish to re-use the videos, you should transfer the videos elsewhere, primarily the course video folder for the next year. The direct viewing links to the videos and subfolders remain the same even if you transfer videos or entire subfolders from one course video folder to another.
Use of the course video folder
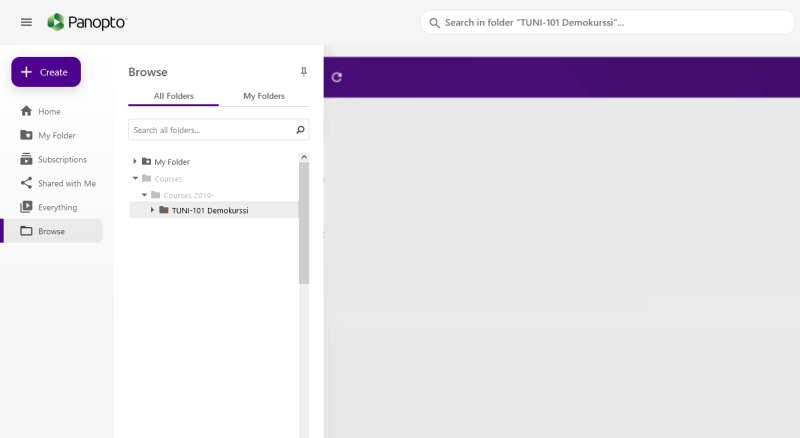
You can find your course video folder via the Panopto block links in the Moodle course or by opening the Panopto browser interface at http://tuni.fi/panopto and selecting ‘Browse’ and ‘My Folders’.
Access rights to the course video folder
Teachers in the Moodle course are granted creator rights and students are granted viewer rights to the course video folder through the Panopto block automatically. You can assign additional rights to the course video folder or individual videos to people outside the course as follows:
- Open the shared folder and click on the Share button.
- Search for users or an existing Panopto user group and replace their access right level with Create or View.
PLEASE NOTE! If you temporarily change your role from teacher to student in the Moodle course and click on the Panopto video link, your role in the Panopto course video folder changes so that you only have student rights! You can fix this issue by returning to the teacher role in Moodle and clicking on the Panopto link again in the teacher role.
Creating a subfolder in the course video folder
You can create subfolders in the Panopto course video folder and specify different access rights to them, if necessary.
- You can also create a folder by navigating to the course video folder view and clicking the Add Folder button.
- Enter a name and description for your folder.
PLEASE NOTE! You should fill out the name and description fields carefully, because this information is used for searching for videos.
Getting started with the Panopto video recording software:
- Install the Panopto video recording software via the Windows or Mac Software Center (if it is not installed already).
- Panopto software can be downloaded and installed into your own computer from Panopto browser interface: http://tuni.fi/panopto.
- Add the Panopto course video folder to your own Moodle course area (you will also be assigned the creator role in the Panopto service):
- Turn the edit mode on in the Moodle course area.
- Click on the Lisää lohko (add block) link in the bottom of the left column (if necessary, open the left navigation column by clicking the hamburger icon in the upper left corner).
- Select Panopto.
- Click on the Provision Course link on the Panopto block that has appeared in the right column. This creates a course video folder and access rights groups in Panopto.
- Start the Panopto software in the Start menu at least once to specify the local destination directory (in the future, you can start the Panopto software in your browser: http://tuni.fi/panopto).
Selecting and checking settings:
- Check/determine the saving preferences in the Panopto software:
- Destination folder in the Panopto service: the course video folder you created earlier in Moodle.
- Name of video: specify a name for your video.
- Set camera image and audio sources.
- Quality settings: choose "High" for camera image (if you are using a camera), choose a resolution of 1920 x 1080 for screen capture, choose 15 fps as the frame rate and 1,500 kbit/s as the video bit rate.
- Image source/sources for Secondary videos:
- Capture PowerPoint: when using PowerPoint with this selection, Panopto saves your slides as images and creates an automatic table of contents from the titles of the slides and indexes the text on the slides for text searches.
- Capture Main Screen: if you are presenting other material in addition to PPT slides, Panopto captures your screen. This feature can also be used with two displays, when using the Duplicate screen mode (recommended).
- Capture Second Screen (if using two screens and Extended desktop selected as display mode): use with caution, if you want to use the Extended desktop mode on two displays. You cannot change the mode during the recording without interrupting the recording.
Recording using the Panopto software:
- Start recording by clicking the Record button.
- Pause recording for a short while by clicking the Pause button, if necessary.
Please note that pausing the recording will not stop the recording altogether, it only marks a time on the recording that will not be shown to the viewers.
You can retrieve any paused sections using the Panopto editor. If you are planning on taking a longer break, stop the recording. - To do this, click the Stop button and wait for the Panopto software to upload the entire recording to the Panopto server.
Once the recording is being processed on the server, you may close the software and your computer, which will ensure that the recording is transferred safely to the Panopto service.
Recording using web browser (Panopto Capture)
You can easily record audio, video, and screens or applications without special recorder software by using your web browser (Chrome, Firefox or Edge). Panopto calls this functionality Panopto Capture:
- Go to the Panopto video folder where you want to add new video.
- Click Create button and select Panopto Capture.
- Select microphone, camera and screen/application sources.
- Start recording by clicking the red circle button.
More information and detailed instructions: How to Create a Video Using Panopto Capture
PLEASE NOTE! Video viewing rights
- If you recorded directly into the course video folder of your course (created in Moodle), the recording is immediately available to the students on the course after the processing is finished.
- If you created the recording in My Folder, you may have to edit the access rights of the new video in the Share view.
More information
- More information about Panopto and important knowledge about lifecycle of recordings
- Video and audio equipment for creating recordings: personal equipment and equipment for loan
- Recording, editing and sharing videos
IT Helpdesk
0294 520 500
it-helpdesk [at] tuni.fi (it-helpdesk[at]tuni[dot]fi)
helpdesk.tuni.fi