Windows 11 updates
- Ensure the following before starting the update
- Short instructions for Windows 11 update
- When the Windows 11 update is mandatory
- Detailed instructions on upgrading Windows 10
- Troubleshooting
- How do I check the operating system of my Windows computer?
- Windows 11 with a new computer
Windows 11 update is available in the Software Center for centrally managed Windows computers that are still running Windows 10 and whose hardware supports Windows 11. The update takes approximately 1-4 hours and includes several restarts. The duration of the update depends on factors such as the performance of the computer and the speed of the network connection (the update can also be done via a mobile data connection). It is not recommended to use the computer during the update, hence we advise to start the update at the end of the workday and allow the computer to complete the update by itself.
In case of issues during the update installation, you can always ask for help from the IT Helpdesk. You can also find instructions for troubleshooting further down this page under the section Troubleshooting.
The software installed on the computer and the user's files will remain on the computer during the update.
NOTICE: The old Windows 10 operating system will be decommissioned on May 15, 2025. After this date, all maintained but unupdated Windows 10 computers will be decommissioned
Ensure the following before starting the update
Before stating the update, its' important to ensure that the following:
- Your computer is plugged in AC power throughout the update. Disconnect any other external devices (printer, usb hard drives, docking station etc.) Some external devices may interfere with the upgrade.
- Your computer's network connection remains available during the upgrade. For example, if you have shared the network from your smartphone, connect the phone to a charger.
- If you are using a wireless network outside the campus that requires you to log in separately each time, we recommend setting the network to automatically connect during the update.
- There is at least 64 GB of free space on the C: drive. If there is not enough space, free up space by deleting unnecessary files or software you have installed.
- Instructions for checking and freeing up disk space can be found here: Troubleshooting
- The Software Center opens normally, and the TUNI Windows 11 32H2 In-place upgrade update is available in the Operating Systems section.
- If the update is visible but in a Failed state, try the update again using the Retry option after ensuring that the prerequisites mentioned are met.
- If the Software Center does not open or you do not see the update listed in the Operating Systems section, contact the IT Helpdesk.
- If you have used the TUNI VPN connection during the workday, disconnect the TUNI VPN connection and restart your computer before starting the update."
Short instructions for Windows 11 update
- Save any incomplete work and close any open software.
- Open Software Center. The Software Center icon can be found in the Start menu, or you can type in the Start menu search the keywords: Software Center.
- When Software Center opens, select the Operating Systems tab from the menu on the left if it is not already open.
- Select the update "Windows 11 23H2 In-place upgrade ". Click the Install button to start the update.
- Next, a confirmation prompt will appear in which the update can be started or still be cancelled. Click the Install button again.
- The text “Installing ...” will appear in the Software Center. From this you will know that the update has started.
- The update is complete when the Windows login screen with the text "Other user" appears on screen.
Necessary device driver updates will be installed in the background immediately after the Windows 11 update, so it is advisable to start using the computer only 15 minutes after the login screen appears.
Tips for a patient upgrader:
- The update may take several hours, and sometimes it may seem that nothing is happening. Wait patiently.
- During the upgrade, Software Center may close and display an error message and will no longer start. This is normal.
- If the update ends in an error, the computer returns to the state it was in before the update. You can then try to restart the update.
If update fails a second time, contact the IT Helpdesk if necessary.
When the Windows 11 update is mandatory
When the update is mandatory, you will receive notifications about the update. Start the update at a time that suits you to avoid unexpected interruptions in your work. The update will start at the latest at the time specified in the notification (image 1) or immediately after the computer is next turned on. You can check the update deadline in the Software Center (image 2).
Image 1: Notification for the mandatory update
Image 2: Deadline for starting the mandator update in the Software Center.
Detailed instructions on upgrading Windows 11
1. Starting the upgrade
Ensure that your computer is plugged in AC power and disconnect any other external devices (printer, usb hard drives, docking station etc.) Some external devices may interfere with the upgrade.
Make sure that your computer's network connection remains available during the upgrade. For example, if you have shared the network from your smartphone, connect the phone to a charger. VPN connection is not needed.
Click “Start” in the prompt box that opens on the screen (Image 3), which opens the Software Center. By clicking “Instructions” you get to these instructions on the Intranet. You can use the “Not now” button to delay the update.
Image 3: Update notification
If you cannot see the notification or want to start the installation immediately, you may do that via Software Center (image 4). The Software Center icon can be found in the Start menu, or you can type in the Start menu search the keywords: Software Center
When Software Center opens, select the Operating Systems tab from the menu on the left if it is not already open.
Image 4: Software Center
Click the Install button to start the update.
Next, a confirmation prompt will appear in which the update can be started or still be cancelled (image 5). Click the Install button again.
Image 5: Confirmation prompt
2. Installation process
Once the installation has started in Software Center, the update will be shown in ‘Installing’ mode. From this you will know that the update has started. The computer will then automatically complete the installation. During this time, the computer will restart several times.
The update may take several hours, and sometimes it may seem that nothing is happening. Wait patiently.
During the upgrade, the Software Center may close and display an error message (Image 6), and cannot be started again. This is normal during the update process. Installation is going on in the background.
The computer should not be used during the upgrade as it will restart automatically several times.
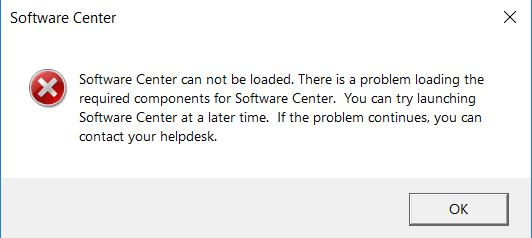
Image 6: Software Center cannot be loaded prompt
The update is in progress and progress will be reported on the screen with various notifications (Image 7). Do not turn off the computer but wait for the update to complete. The update progress bar appears on the screen during most of the update.
Image 7
3. Completing the upgrade
The update is complete when the login screen with text "Other user" (Image 8) appears on screen.
If the screen has your name on it, it is not the login screen, but lock screen instead. This means that the update is not complete, but the screen has gone into protection lock. You can type your password to unlock if you want, but let the update process finish before starting working on the computer.
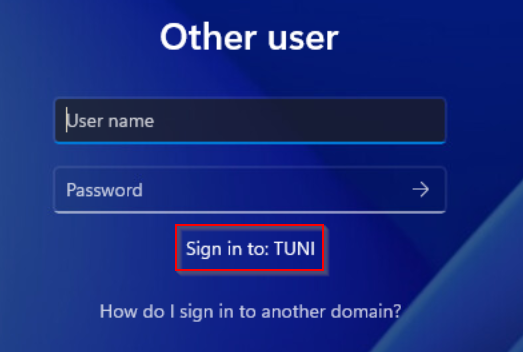
Image 8: Login screen
The first login after the update will take a little longer than usual and the following message will appear on the screen (Image 9).
Image 9: Don't turn off your PC
Other regular updates may also occur on your computer after you upgrade Windows, and they may require you to restart your computer. Therefore, it is advisable to start using the computer only 15 minutes after the login screen appears.
Troubleshooting
With these you can resolve some upgrade issues on your own.
Problem: The update can't be started because the drive C: has too low free space.
The upgrade requires 64 GB free space on computer's drive C:. If there is not enough space on the C drive to perform the upgrade and you need help identifying items to remove, you can install the WinDirStat software from the Software Center. The software will provide you with a detailed description of the files and folders on the C drive and the space they occupy. With this information, you can delete unnecessary files or move large files from the C drive to another location.
- Open the Software Center and search for the WinDirStat. The software can be installed by yourself on all staff TUNI Windows computers.
- Once the installation is complete, open WinDirStat from the Start menu.
- When the software starts, it will ask which items to scan. Select Windows (C:) and click OK.
- Wait for the program to scan the contents of the C drive.
- Once the scan is complete, you can navigate through the tree view on the left to inspect the situation for each folder/file.
- Focus on the contents under the folders C:\Users and C:\Temp, which you can delete with your user rights.
- Items related to the operating system, such as C:\Windows, cannot be deleted.
- Items related to installed programs cannot be deleted directly; instead, the program must be removed through its uninstall function. If you identify a large but unnecessary program, check if you can remove it yourself through the Software Center.
- If necessary, contact the IT helpdesk to identify/remove items.
Problem: The computer's WiFi doesn't work after the upgrade.
- Log in to the WiFi network again by typing in your account and password again. See the pages Wireless networks.
- If possible, connect your computer to network with the cable for a while.
- If the computer's brand is Lenovo, type "System update" to the Start Menu search box and use the tool to find and install any updates. Then try the WiFi network again.
- Type "Network reset" to the Start Menu search box and start network reset function.
Problem: The computer's power management settings or screen lock settings returned to default settings.
- Set your preferred power management settings again. See How can I change the power management settings?
Problem: Default applications (e.g. web browser and email application) have changed after upgrade and notifications about them appear on the screen.
- Type "Default apps" to the Start Menu search box and choose your preferred default apps again.
Problem: An application that has been installed from Software Center or by IT Services doesn't work after the upgrade.
- Try restarting the computer.
- Open Software Center and see if the software is listed there and Uninstall button is available. Try running Uninstall, restart the computer, and then Install.
- If these tips didn't help, contact the IT Helpdesk.
Problem: An application that I have myself downloaded from the Internet and installed, doesn't work after the upgrade.
- Try restarting the computer.
- Download and install the application again using the same method than you used previously, preferably upgrading to the application's latest version.
- If these tips didn't help, contact the IT Helpdesk.
Problem: I am not receiving notifications about the Windows 11 update as described in these instructions, or I cannot find the update in the Software Center.
- The update is not distributed to computers that are not compatible with the Windows 11 operating system or whose warranty has expired or will expire during 2024.
- Order a new computer through the helpdesk.tuni.fi service portal.
How do I check the operating system of my Windows computer?
You can find out the version installed on your computer by opening the Start menu and typing the command: winver in the search field. In the window that opens, you will see your computer's operating system and a four-digit version number. Below is an example of Windows 11 operating system version 23H2.
Windows 11 with a new computer
New computers come with the Windows 11 operating system pre-installed. Staff and people with an extended resource agreement will automatically receive a notification about the need to acquire a new computer when the warranty period of the old computer is nearing its end.
Therefore, you do not need to update your current computer’s Windows 10 operating system if the computer’s warranty period ends by June 30, 2025. You can check your computer’s warranty period in the service channel at helpdesk.tuni.fi under the “My Information” section in the top left menu.
IT Helpdesk
0294 520 500
it-helpdesk [at] tuni.fi (it-helpdesk[at]tuni[dot]fi)
helpdesk.tuni.fi