Microsoft Clipchamp
Microsoft Clipchamp is a video editing tool and part of the Microsoft 365 services. Clipchamp includes tools for creating, editing, and sharing videos. It also features AI-based functions such as text-to-speech and automatic subtitles. Instructions for using the visual brand of Tampere Universities are at the bottom of the page—see the guidelines for using the Microsoft Clipchamp brand kit.
Clipchamp works in a web browserand with the Clipchamp app installed from the Microsoft Store. The browser version and the application have the same functionalities.
Getting started:
- Sign in to the Microsoft 365 portal
- Open Apps and select Clipchamp
- Start creating and editing videos
More instructions for using Clipchamp are available on Microsoft’s website.
All files in a Clipchamp project are saved in OneDrive and SharePoint document libraries in a dedicated folder.
The folder includes the project file, source materials in the "assets" folder, and exported videos in the "exports" folder. When a project is opened, Clipchamp downloads the source files from OneDrive to a temporary folder on your computer, and video is processed locally on your computer.
Do not use Clipchamp for editing if the material is sensitive and must not end up in cloud services.
Recording and editing with Microsoft Clipchamp
With Microsoft Clipchamp, you can:
- Record camera and computer screen (Record & Create)
- you can record up to 30 minutes at a time
- Edit video clips: adjust colors, crop image, remove silent parts, speed up video, add effects and fades, adjust audio levels
- Use Clipchamp’s stock materials (music, graphics, images, videos)
- You can also use content from the media bank: https://mediapankki.tuni.fi
- Tip: The brand kit includes overlay images to cover participant names or faces in Teams recordings
- Share the recording via a viewing link. Videos are automatically saved to OneDrive or SharePoint and easily shareable.
- Use automatic speech recognition to create subtitles. Subtitles can be edited, but timestamps cannot be manually added.
- Creating subtitles:
- Select CC Captions >> Turn on auto-captions
- Choose language and select transcribe media
- Once speech is recognized as text, you can edit it in the editor
- Creating subtitles:
- Convert written text into natural-sounding speech using AI-based speech synthesis (Record & Create >> Text to speech)
- Choose the language and voice
- Adjust pitch and speed of the voice
- Edit recordings with AI assistance. You can remove parts of the video by deleting text from the transcript. Instructions for AI-assisted editing: https://clipchamp.com/en/blog/ai-transcript-based-editing-clipchamp/
- With the additional Microsoft 365 Copilot license, you can create video content in Clipchamp using text prompts. Based on the prompt, Copilot generates illustrations and speech synthesis voiceovers for the Clipchamp project, which can be edited. The videos use stock images. This is suitable for creating video drafts and writing video scripts.
Microsoft Clipchamp Brand Kit
In Clipchamp, you can create your own brand kits or use organisations own brand kit. Using a brand kit helps maintain a consistent visual style in videos. You can add logos, fonts, and graphics to your own brand kit and share it with project members. Brand kits can be shared with other users. Instructions for brand kits: https://clipchamp.com/fi/blog/brand-kit
The organisation’s brand kit includes recommended fonts, color palettes, and logos. Follow graphic guidelines for logo usage: https://markkinointipankki.tuni.fi/en/materials/logos/
Using the Clipchamp brand kit:
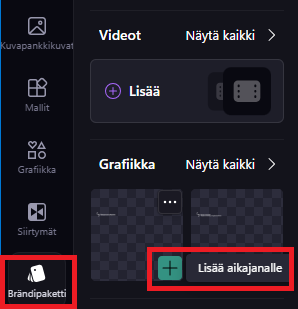
In Clipchamp, select the Brand Kit function
- choose the Templates package
- The Colors section includes brand colors
- The Fonts section includes the recommended Open Sans font
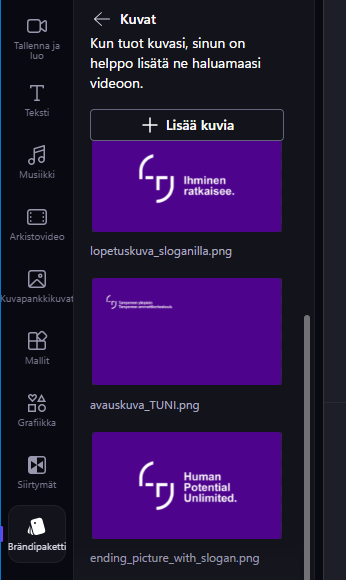
- The Images section includes opening and ending images
- The Graphics section includes organisational logos and overlay images. These logos are in the Graphics section because they are pre-positioned in the top left corner of the image (this positioning is not possible in the Logo category)
- The Videos section includes animated ending videos with logos
Logos are available in Finnish and English—choose the logo based on the video’s language and ensure the logo color stands out from the background
Adding a logo to the timeline in Clipchamp:
- Position the logo to the top left corner of the video frame with space around it; do not place other text near the logo
- Use the recommended Open Sans font from the brand kit with organisational graphic materials
- The Images section of the brand kit includes opening and ending pictures such as a closing picture with a slogan